In the 1930s, the Royal Air Force, (RAF) organised the defence of Britain into different areas, known as groups. Each group defended different areas of the country. During the Battle of Britain, RAF Duxford in Cambridgeshire was a Sector Station for 12 Group, which covered the Midlands and East Anglia. This meant that personnel based there directed Duxford and other surrounding airfields’ squadrons into battle. Duxford also controlled a satellite airfield at nearby Fowlmere.
During the Battle of Britain, Duxford and Fowlmere had two main jobs - to protect the Midlands and help the fighters of 11 Group when needed. 11 Group was responsible for the south-east of England, including London, and bore the brunt of the fighting in the summer of 1940. Duxford and Fowlmere, located on the border between 11 and 12 Groups, were well-placed to provide support when requested.
Although only one squadron, No.19, was based at Duxford or Fowlmere throughout the battle, several other units, made up of pilots from across the world, operated from Duxford. As well as the pilots, Duxford was also home to the ground crew and other personnel needed to run the station and direct attacks. In all, 15 men lost their lives flying from Duxford and Fowlmere during the Battle of Britain.
Here are 13 photos that showcase life at Duxford and Fowlmere during the Battle of Britain.
1. The Operations Room
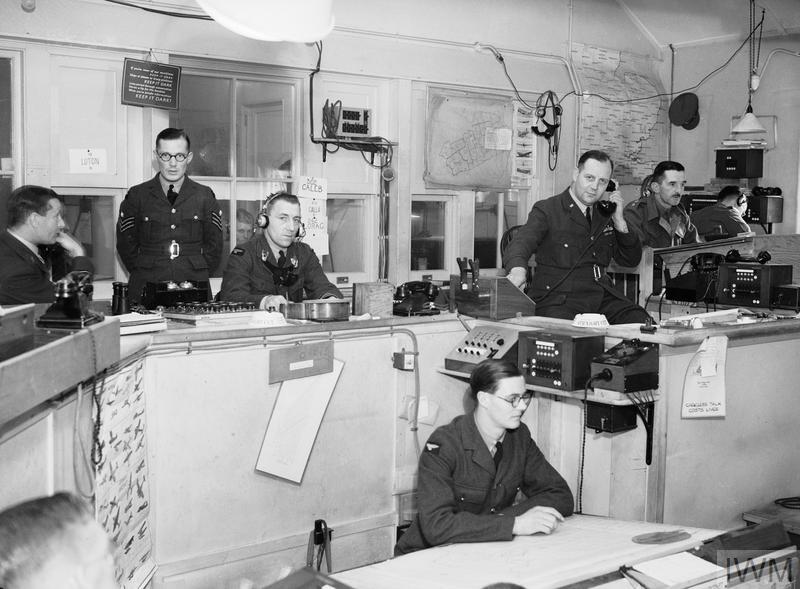
This photo shows the interior of the Operations Room at Duxford during the Battle of Britain. All operations rooms had a similar layout, and from here the Sector Controller would receive information about incoming enemy aircraft and their movements and the movements of friendly aircraft would be plotted on the operations table. The Controller was in direct contact with the aircraft and guided them to where radar and the Observer Corps indicated the raiders would be. Once the enemy was spotted, commanders in the air took over. They were in charge of how the German fighters and bombers would be attacked.
2. Women’s Auxiliary Air Force

Many women were stationed at Duxford during the battle, employed in vital work such as plotting aircraft positions in the Operations Room. This photo shows members of the Women’s Auxiliary Air Force (WAAF) receiving reports of enemy aircraft movement. The WAAF plotters updated the map in the 'Ops Room' to show where friendly and enemy aircraft were and give the controllers an overall picture of what was happening.
3. No. 242 Squadron at Duxford
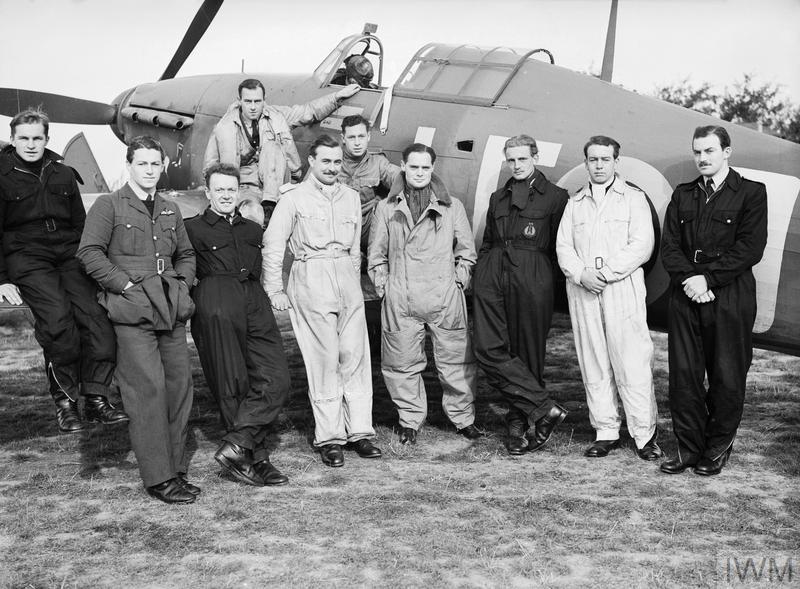
No.19 Squadron was the only unit to be based at Duxford throughout the entire battle, but several others, made up of pilots from around the world, operated from Duxford. This photograph shows Douglas Bader, the legendary fighter pilot with artificial legs, and the pilots – many Canadian – of his No. 242 Squadron. Bader brought in a former No. 19 Squadron colleague, George Ball (third from right), to help him run the squadron. Many of the pilots in this photograph rose to higher positions in the RAF, such as Percival Stanley Turner (third from left) and Denis Crowley-Milling (far left).
4. Waiting to fly
This photograph is one of a series taken by Air Ministry photographer Stanley Devon, designed to show a typical patrol of a fighter squadron. In this staged shot, the pilots are seen just before the ‘scramble'. ‘Scramble’ was the term used for the pilot’s rush to get to their aircraft and get airborne as quickly as possible to face incoming German aircraft.
5. ‘Scramble’
This is another photograph in the series by Air Ministry photographer Stanley Devon, taken in September 1940. It is often shown as a genuine ‘scramble’ shot but the previous photograph, showing the pilots smiling and waiting for the photographer to give them the ‘go’, suggests it was actually staged.
6. Czech pilots at Duxford
As well as British airmen, there were Australians, Canadians, New Zealanders, Czechs, Poles and Americans based at Duxford. This photo shows pilots from No. 310 (Czech) Squadron, formed at Duxford, in July 1940. Seated, left to right, are Vilem Göth, Jaroslav Maly, Gordon Sinclair, John Boulton, Jerrard Jefferies, Stanislav Zimprich, Jan Kaucky, Frantisek Rypl, Emil Fechtner and Vaclav Bergman. Standing, left to right, are Svatopluk Janouch, Josef Vopalecky, Raimund Puda, Karel Seda, Bohumir Furst, and Rudolf Zima. Six of these pilots did not survive the war.
7. The Duxford Big Wing
During the Battle of Britain, Duxford’s squadrons were asked to help protect the airfields of 11 Group while the 11 Group squadrons were fighting. This marked the start of Duxford’s most famous role in the battle as home of the ‘Big Wing’. The ‘Big Wing’ referred to the use of large formations of fighter aircraft, which some thought would be the best way to attack German raids. The tactic was controversial because organising large formations could take time and in some cases led to delays in mobilising against the Germans. It also caused confusion for the men running the battle over London and the south-east, as they tried to plot the position of enemy raids and friendly fighters. The commander of 12 Group at Duxford, Air Vice-Marshal Trafford Leigh-Mallory, and Squadron Leader Douglas Bader, who led the wing in the air, were keen advocates of the ‘Big Wing’ concept, organising bigger formations of three and sometimes five squadrons operating together from Duxford. This led to tensions between the key men responsible for organising the UK’s defence and even the Commander-in-Chief Sir Hugh Dowding about the best approach to beat the Luftwaffe. This photograph was also taken by Stanley Devon, who Bader invited to photograph his Duxford ‘Big Wing’ from the air. It shows part of the Wing overtaking Devon's aircraft.
8. Pilots return from combat

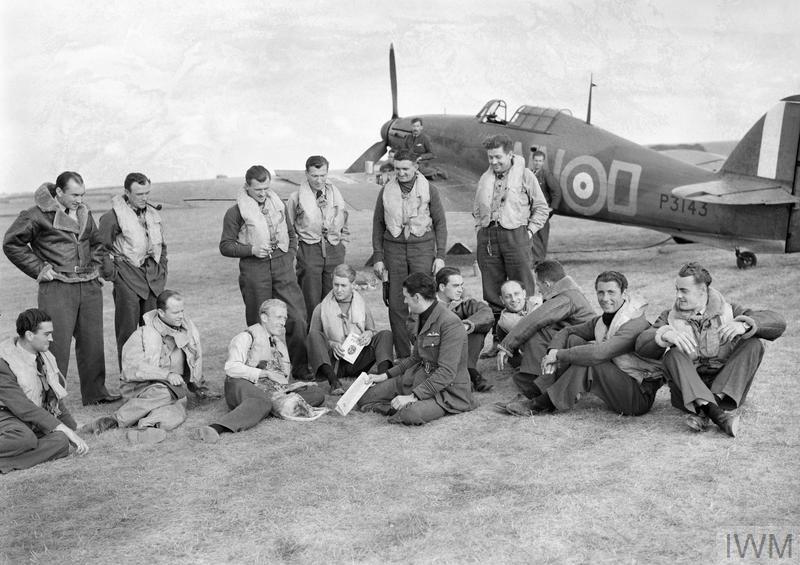
Spitfire pilots of No.19 Squadron RAF discuss a recent sortie (mission) at Manor Farm, Fowlmere, near Duxford, September 1940. The tall pilot at the back is Hugh ‘Cocky’ Dundas, who wrote a book about his experiences after the war – Flying Start. The pilot with the moustache is Harry Steere, who was decorated for bravery before the battle began. He was killed, aged 30, on 9 June 1944 – three days after D-Day. Unlike many photographs taken at airfields during the Battle of Britain this is not believed to be staged.
9. Lunch in the Officers’ Mess at Fowlmere
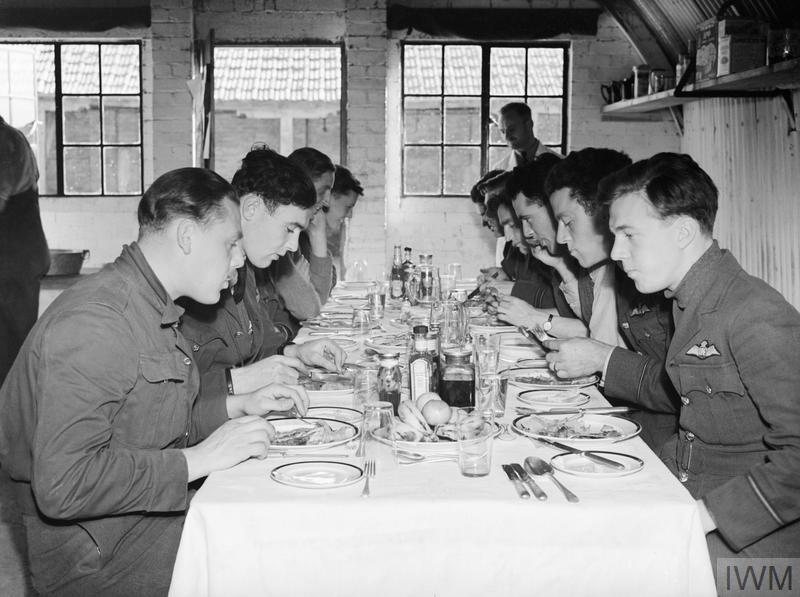
Pilots of No. 19 Squadron RAF eat lunch in the Officers' Mess at Fowlmere in September 1940. Conditions at Fowlmere were much more primitive than Duxford and could be uncomfortable for pilots and ground crew, who lived in tents or basic huts.
10. Relaxing after a sortie

Pilots of No.19 Squadron relax between sorties outside their crew room at Manor Farm, Fowlmere, near Duxford, September 1940. Left to right: Pilot Officer Wallace Cunningham, Sub-Lieutenant Arthur Blake and Flying Officer Francis Brinsden. Blake was a Royal Navy Fleet Air Arm (FAA) pilot with No.19 Squadron and was killed in combat in October 1940.
11. Essential ground support
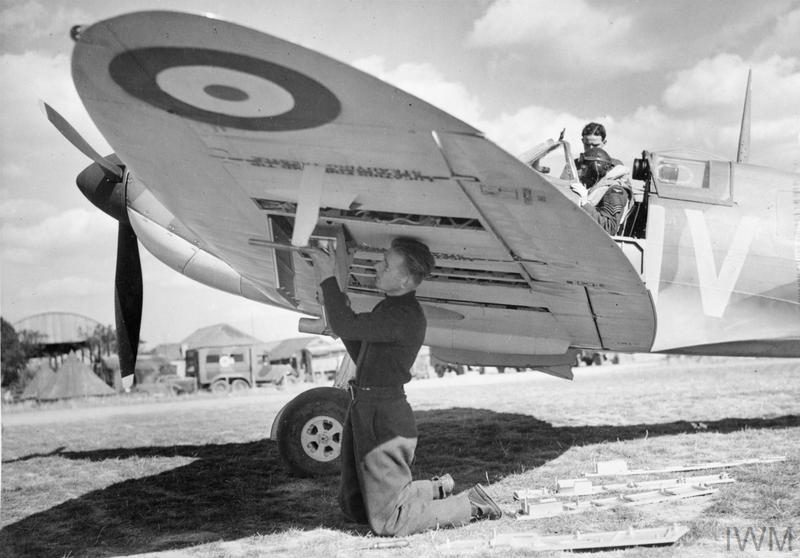
Armourer Fred Roberts rearms the machine guns on Sgt Bernard 'Jimmy' Jennings’ Spitfire at Fowlmere, September 1940. No.19 Squadron had been given a new type of Spitfire in June – the Mk IB. This was fitted with two heavy 20 mm cannon, with much more destructive power than machine guns. Unfortunately, the cannons were very unreliable and often jammed. Eventually, the pilots asked for their cannon-armed Spitfires to be taken away and they were replaced with machine-gun-armed aircraft in September.
12. Royal Recognition
Many of Duxford’s pilots who flew in the Battle of Britain were decorated for valour. Several awards were presented by King George VI when he visited Duxford after the battle with Queen Elizabeth on 16 January 1941. The royal visit included a tour of the station and lunch in the Officers’ Mess.
13. Some of ‘The Few’

Pilots of No. 19 and No. 616 Squadrons pose by a Spitfire. On the wing (left to right) are Brian Lane, ‘Grumpy’ Unwin and Francis Brinsden – with Flash the Alsatian and Rangy the Spaniel. In front of the wing are Bernard Jennings, Colin MacFie, Howard Burton and the American volunteer Philip Leckrone. Lane, Burton and Leckrone did not survive the war. MacFie was shot down and captured in July 1941.


