Following Italy's entry into the Second World War on 10 June 1940, and France's surrender on 22 June, British Admiral Sir Andrew Cunningham's Mediterranean Fleet at Alexandria in Egypt was outnumbered and surrounded by a largely hostile shore. Admiral Sir James Somerville’s ‘Force H’ was sent to Gibraltar to cover the western Mediterranean, filling the vacuum left by the French after their surrender.

The British then began denying the Axis powers – Germany, Italy and their allies – access to the Mediterranean, disrupting the flow of vital supplies to German and Italian forces fighting in North Africa.

On 21 November 1940, Cunningham's torpedo bombers sank three Italian battleships at Taranto and on the night of 27-28 March 1941 he defeated the Italian fleet at Cape Matapan. The Italian cruiser Pola was crippled and later sunk, along with the cruisers Zara and Fiume and two destroyers. Three thousand Italian sailors were killed. Afterwards, the Italian fleet was generally ordered to avoid battle.

German aircraft were sent to support the Italians and crippled Cunningham's fleet around the island of Crete in May. Luftwaffe air attacks targeted Royal Navy ships evacuating British and Commonwealth troops and naval losses were so severe that on 30 May the evacuation had to be abandoned. Five thousand men were left behind.

Warships and strike aircraft based on Malta were the key to disrupting Axis supplies. Malta's submarines sank 300,000 tons of Axis shipping between July and September 1941, a situation described by the German naval liaison staff in Rome as ‘catastrophic’. They destroyed 63 per cent of all Axis cargoes bound for North Africa in November 1941, after most German aircraft had already left for Russia. This halted General (later Field Marshal) Erwin Rommel’s land operations in the theatre. 

Photographs

Attack on the French fleet at Oran

French sailors escape from fires below deck on board an unidentified French battleship which had been damaged during the attack by Royal Navy warships on the French Fleet at Oran. The controversial attack was carried out by Force H under the command of Admiral Sir James Somerville, after the French had refused the British Government's demand that its Fleet either scuttle itself or sail to a British port.
© IWM HU 63611

This photograph shows French sailors escaping from fires below deck, on board a badly damaged warship at Mers-el-Kebir in Algeria in July 1940. British Prime Minister Winston Churchill had ordered Somerville to bombard the French squadron. This risked war with Vichy France, but removed the possibility of French warships being used against Britain and signalled to neutral nations that Britain would fight on. Another French squadron at Alexandria was disarmed. Almost 1,300 French sailors died; most of the casualties occurred when the battleship Bretagne exploded.

The Luftwaffe returned in 1942, and raided Malta almost every day between 1 January and 24 July, neutralising the warships and aircraft. Supplies flowed again, allowing Rommel to advance to El Alamein. During March and April, 6,728 tons of bombs were dropped on Malta, killing 1,493 of its citizens and wounding 3,764 more.

On 15 April 1942, King George VI wrote to the Governor of Malta to tell him of his decision to award the George Cross to the island and its people, ‘To bear witness to a heroism and devotion that will long be famous in history.’ The siege was lifted in August 1942, when the Royal Navy fought through the ‘Pedestal’ convoy. Allied control of the Mediterranean became complete, helping to bring about the final Axis collapse

Art

Malta: No Time to Lose

A daylight scene of frantic dockside activity. Helmeted dockworkers on the left take hold of a swinging load of white sacks being unloaded from the side of a merchant ship in the background. Several sacks are strewn around their feet. On the right another soldier hauls on a rope, guiding a loading net full of boxes down towards a second team of dockers. In the centre stands a figure, stripped to the waist, issuing orders. Puffs of smoke from anti-aircraft fire can be seen in the sky, upper left.
© IWM Art.IWM ART LD 3257

Malta: No Time to Lose - Soldier Dockers Unloading a Convoy During a Raid, 1943, By Leslie Cole.

Malta’s position mid-Mediterranean between North Africa and Italy made it vulnerable to attack. British efforts to re- supply Malta were at particular risk: during Operation Pedestal, a convoy bound for Malta from Gibraltar in August 1942, half the merchantmen were sunk by enemy attack. In 1943, when Leslie Cole visited Malta, the devastated island was still subject to air-raids and alerts as the Allied invasion of Sicily and the Italian mainland got underway. Some of Cole’s drawings in Malta show people sheltering from attack in underground shelters and running for cover. This painting of dock-workers has an urgency often found in his work, but the image has an almost theatrical air, with the central figure orchestrating the scene as if conducting a symphony. In this case the danger of the scene is subordinate to its mesmerising pattern, punctuated by the strange helmet-carapaces.

Despite supply lines of just a few hundred miles across the Mediterranean, Axis forces in North Africa were plagued by shortages compared to the British, whose supplies often travelled 14,000 miles (22,530 km) around Africa. This was the Royal Navy's contribution to the ‘Desert Victory’.

Related content

Crusader tanks and other vehicles out on patrol in the Western Desert, 26 August 1942.
© IWM (E 16132)
Second World War

How The British Secured A Victory In The Desert During The Second World War

When Italy declared war on 10 June 1940, the Italian Army in Libya threatened the vital Suez Canal in British-occupied Egypt. Italian forces attacked Egypt on 13 September. General O’Connor’s Western Desert Force was outnumbered, but his commander-in-chief, General Wavell, ordered a surprise attack at Sidi Barrani three days later. 

Wing Commander P le Cheminant (later Air Chief Marshal Sir Peter le Cheminant), Commmanding Officer of No. 223 Squadron RAF, briefs aircrews for the final bombing raid of the North African campaign in front of a Martin Baltimore Mark IIIA at La Fauconnerie South, Tunisia; (scene reconstructed after the event). On 12 May 1943, eighteen Baltimores of Nos. 55 and 223 Squadrons RAF, led by le Cheminant, bombed remnants of the German 90th Light Division which had refused to surrender its defended positions.
© IWM (CNA 804)
Second World War

A Quick Guide To The Air War Over North Africa In The Second World War

When fighting commenced in North Africa in June 1940, the Royal Air Force's (RAF) Air Headquarters Egypt immediately mounted bombing missions against Italian targets in Libya and helped repel the Italian offensive into Egypt.

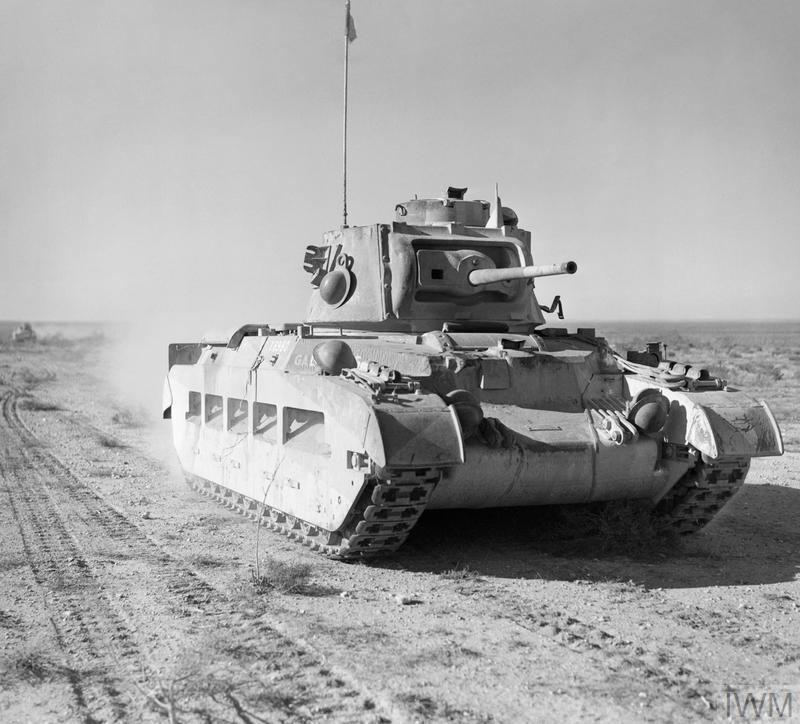
A Matilda tank of the 7th Royal Tank Regiment in the Western Desert, 19 December 1940.
© IWM E 1416
Second World War

The Tanks And Guns Of The Second World War's Desert War

The open nature of warfare in North Africa accentuated the importance of armoured fighting vehicles and artillery. British tank design was governed by tactical principles which assigned slow but well-protected 'I' tanks to support the infantry, while speedy but lightly armoured Cruiser tanks fought the enemy armour.

The Second World War 1939 -1945: Montgomery's chance to command a modern battle army came in 1942 when he was sent to Eygpt to replace Auchinleck as commander of the Eighth Army. He was photographed shortly after his arrival by air in Cairo.
© IWM CM 3327
Second World War

A 5-Minute History Of The Battle Of El Alamein

At 9.40pm on Friday 23 October 1942, the Battle of El Alamein began with a four-hour ground and air bombardment launched by Britain and its allies. As it subsided, the troops began their advance.

The damaged tanker OHIO, supported by Royal Navy destroyers, approaches Malta after an epic voyage across the Mediterranean as part of convoy WS21S (Operation Pedestal) to deliver fuel and other vital supplies to the besieged island. OHIO's back was broken and her engines failed during heavy German and Italian attacks. Because of the vital importance of her cargo (10,000 tons of fuel which would enable the aircraft and submarines based at Malta to return to the offensive), she could not be abandoned.
© IWM GM 1480
Second World War

How Malta Survived The Second World War

Between 1940 and 1942 the British colony of Malta in the central Mediterranean faced relentless aerial attacks by the Luftwaffe and Italian Air Force. The Royal Navy and Royal Air Force both fought to defend the island and keep it supplied.

 A mine explodes close to a British truck as it carries infantry through enemy minefields and wire to the new front lines.
© IWM (E 18542)
Second World War

How the Second Battle of El Alamein was won

The Second Battle of El Alamein is one of the most famous of the Second World War, an old-school infantry slog through deadly minefields more akin to the First World War than the Second. A battle which would prove the tide of the war had truly turned in the Allies' favour. In this episode, Bryn Hammond examines how the Allies won the Second Battle of El Alamein.